
|
| |
 |
 |
|
| |
| |
|
|
Go
|
New
|
Find
|
Notify
|
Tools
|
Reply
|
|
Thank you all - I'm having a lot of fun with this project. I had this whole week off, so I was able to make a lot of progress.
Jamie - those girder towers are awesome - where did you get them? No gold leaf on my model - it's a very stylized version of the real thing, which is far more complex and sophisticated:  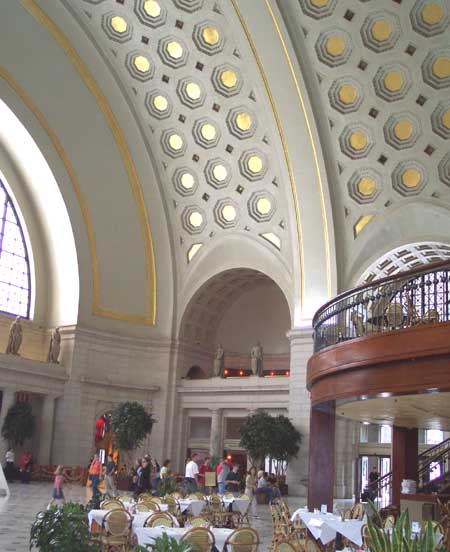 Each coffer in the real thing is octagonal in shape, and each one is actually three stepped-down coffers inside each other, with the final surface being the gold leaf. Then there are the coffered diamonds in between. I found this great material (another one, again at Home Depot) which has the perfect parallel runes in it that the real U.S. has on its barrel exterior. I'm working on that now - hope to have it done by weekend's end. Cheers, John |
|||
|
Jamie,
Where does one get columns like those shown in your picture? Jan |
|||
|
I got them from
Special Shapes Four Beam sample Hobblyinc 1-800-517-4273 I paid around $5.00 each beam. I've made 65 so far and need 4 to finish. They might redirect you to a local supplier. They come in a flat sheet, cut them off the spruce and bend them up and solder. this and I solder them together. I didn't know how to solder that well, After a couple of attempts I've become an expert at these. Flow the solder at the same rate the flux moves seams to be the secret with these. It doesn't take much. Once I got in the grove I was cranking these pupies out about 10 minutes each max. I have a link on soldering Photo Eched brass. It realy breaks your heart to paint them ater there assemblied they look so good bare. I can find them through ASAP sorce or other online carriers> I believe Whathers has them also. THe part number is #2778 for 2 web sides. part # 2781 is webbed on all 4 sides. There 1/4" square and about 6 1/2" tall. There made for the HO market as large bridge beams. It's sade as I find these great little details they seam to be disconntinued as soon as I buy them. This product is new though. THey offer all kinds of goodies. John How about if you were to add little brass finials in the center of each square? Use like a small brass cap nut or something from the craft store. Cheaper than gold. Just a thought. How will anyone see the interior roof? Will you have access to view the roof? Jamie The sad |
|||
|
Aye, there's the rub. Observers will barely be able to peer through the black grilles in the porticos on the back & front of the main building to see the lighted barrel ceiling. Other than that, I'm afraid pictures are the only way to see it. Which is one reason why I think this is the end of my ambitions for the interior. Jamie your idea of brass insets is a very good one. But I think I've exhausted my will for this round. I owe what I've done so far (on the interior, at least) in large part to Mike Casatelli. The interior of his fabulous GCT model motivated me to go much further with my interior than I had planned. Mostly, I just wanted to make it so that anyone who glanced inside one of the windows would see something other than raw light bulbs and an unfinished interior. This has now become much more than I bargained for! I think I am going to do some more interesting things (eventually) with the interiors of the east & west wings, and the connecting halls when I get to those. And brass detail parts may play a role in that. Thanks for the tip! John This message has been edited. Last edited by: JohnBoy, |
|||
|
Will you have a GG-1 in the basement?
Where you going to make Tony one? It looks great!, I don't know if I have the pacients to do that. Of coarse I'm hand stringing catenary and I don't have the pacients for that either. |
|||
|
Two things happened yesterday: I got a chance
to play with the wide-angle attachment that came with our Fuji S7000,
and I got started on the exterior of the barrel roof.
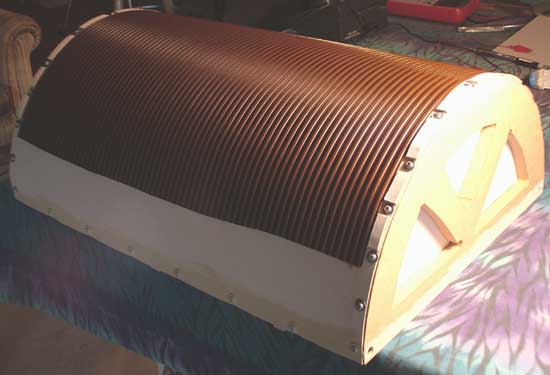 This stuff was just sitting there at Home Depot. It's some sort of vinyl floor safety tread runner. Just about perfect for the runed ceiling of the real Washington Union Station (WUS). Almost the right color, too!  Well, almost. The real thing, at least from the two or three lousy photos I have of it, looks to be an annodized bronze or aluminum color, somewhat weathered. This is pretty close. The wide-angle attachment enabled me to get somewhat more inclusive shots of the lighted interior: 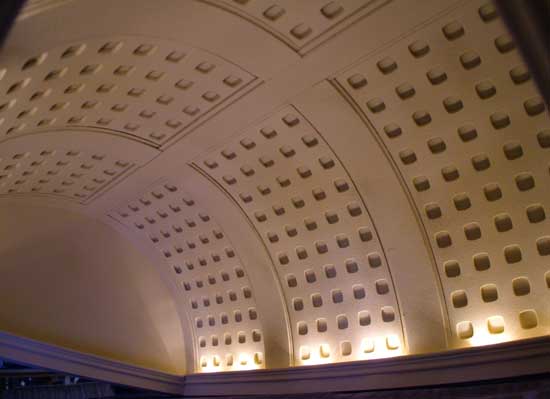 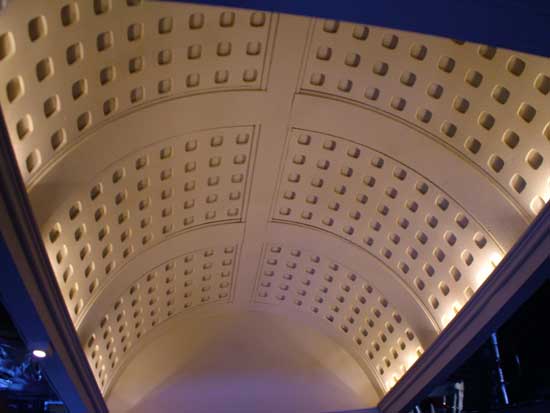 Cheers, John |
|||
|
WHAT A PAIN! I had braced the main building
with diagonal wedges of wood to reinforce the corners. But I apparently
did not take this into account when considering how the barrel roof
would slide into the top.
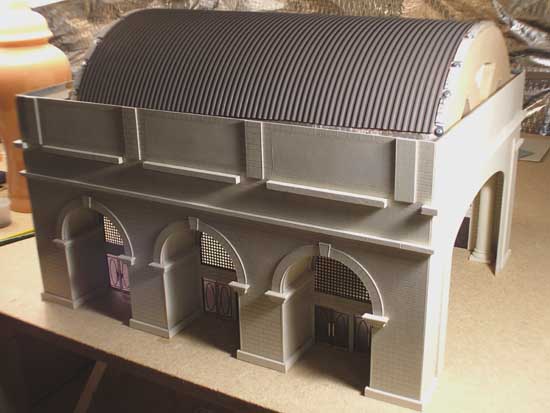 SOOOOO.... I had to Dremel the bloody things out of there in order to do a test drop to make sure things would fit reasonably well. 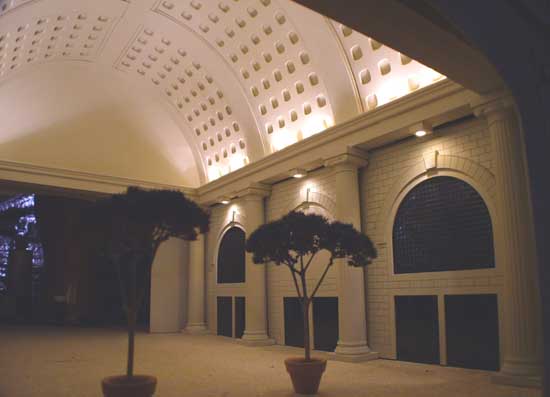 I got the interior pieces installed, and then just set the four additional columns up along the back wall to hold up that end of the barrel unit. These will eventually be cemented in place to that back wall. 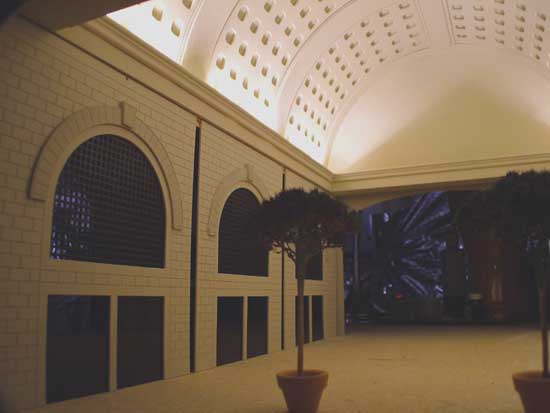 The front side has a kind of "shelf" resulting from the arch portals which extend into the building, so that side of the barrel unit just rests on top of the shelf. 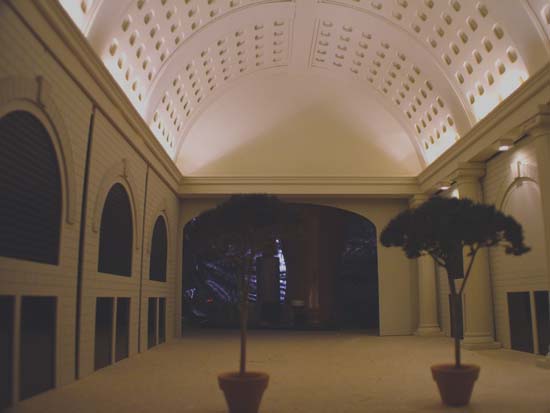 This is quite unfinished still; I have some interior pieces which I still need to install, and of course the exterior of the barrel vault is not yet complete. But I couldn't resist turning on the lights for a peek at what this would look like lit up. Hope you all have a great T-Day! Cheers, John |
|||
|
Impecable job of scale modeling. Absolutely
outstanding. A custom model such as this has probably cost you plenty
of time and money. Your models are detailed to the highest degree and
seem to take quite a long time to complete
On the other hand I model in artboard to achieve the whole scenic effect. Takes me about 6 or seven evenings to finish a structure. Since you have such great detail, how do you plan to show this inside detail on your layout? Short of placing a camera inside what approach are you taking? |
|||
|
Dennis - you are right - see the above part of the thread:
http://ogaugerr.infopop.cc/groupee/forums/a/tpc/f/57660...981070443#4981070443 You might be surprised at how cost-effective this process is. The lasering is without question the most expensive part, but you just have to spread it out over long periods of time, and it doesn't feel all that bad. This project will most likely cost me somewhere in the $1000 to $1500 range all totaled, but this will be spread out over probably 2 years of time. Comes out to maybe $50 - $60 a month. This works out well, as it takes me about that long to work on each piece. The barrel unit is 100% custom - no lasering at all. You mentioned that you work a lot with "artboard" - I assume this is what I'm calling "matteboard". I've heard it called several different things - "illustration board" is the cheapest (cold-pressed), all the way up to "museumboard" which is the best, as it's 100% rag material. I have worked with this extensively, and IMO it's the best general-purpose material to use in scratchbuilding. The barrel roof you see here is at the core matteboard bent over and screwed into the half-circle side frames. I've also made almost all of my city buildings from matteboard templates (see our West Park Tower templates which have the windows pre-cut out of them). The rest of that barrel unit is all material I stumbled across in stores - very inexpensive - but you're right - it's a lot of work! Cheers, John This message has been edited. Last edited by: JohnBoy, |
|||
|
Get's better each post!
|
|||
|
| Previous Topic | Next Topic | powered by groupee community | Page 1 2 3 |
| Please Wait. Your request is being processed... |
|
|||
| Site | The OGR Yard Office | ||
| Servlet | eve2da005 | ||
| Version | 1.2.11 build 8443 | ||
| Module | Forums 4.0.3 | ||
| Stylesheet | "OGR Forum" | ||
| Wordlet Set | "Default Wordlet Set" | ||
|
| View $GS_USERNAME's Public Profile | |
| Add $GS_USERNAME to my Buddies | |
| Invite $GS_USERNAME to a Private Topic | |
| View Recent Posts by $GS_USERNAME | |
| Notify me of New Posts by $GS_USERNAME |

