|
|
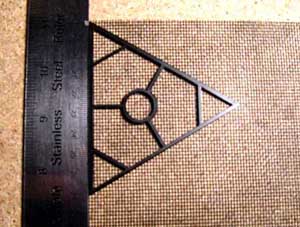
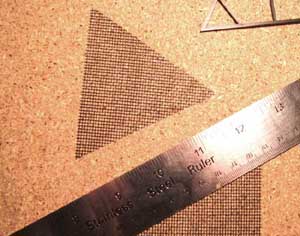
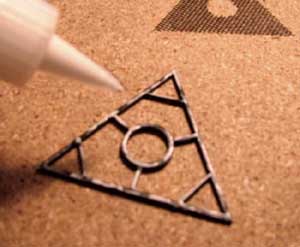
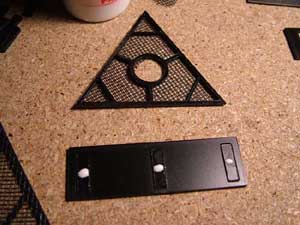
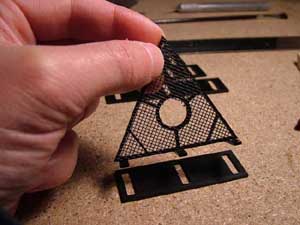
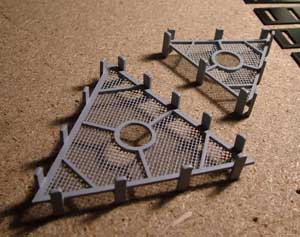
Step 1
Start by placing the screen mesh down on a table, and then placing one of the triangles on top of it. Place the
triangle with one of the flat sides near the edge of the screen mesh, as shown.
Place a metal straight-edge right up against the edge of the triangle, as shown. Then, move the triangle away,
while holding the metal straight-edge in place with your other hand. Move the straight-edge very slightly to the right,
so that the cut will end up just inside the triangle edge. Press firmly on the straight-edge, and use an X-Acto
knife to make the cut.
|
|
|
|
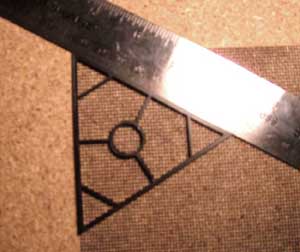
Step 2
Place the triangle back on the mesh, so that the left-edge is just barely over the edge of the mesh you just cut.
Now place the straight-edge up against the upper edge of the triengle, as shown. We are trying to get a triangular-shaped
piece of mesh that is just a tad bit smaller than the footprint of the triangle itself, so that the mesh does not extend
over the edges.
|
|
|
|
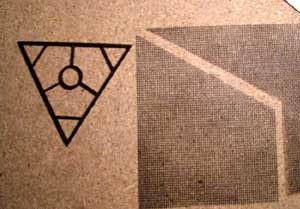
Step 3
Make the same cut using the X-Acto knife.
|
|
|
|
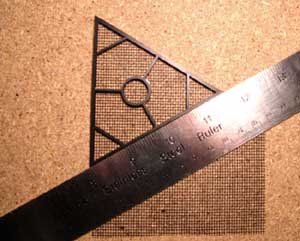
Step 4
Repeat the process for the last cut. Be sure that each time you move the triangle away, that you move the
straight-edge slightly inward so that the cut causes the mesh to be a little bit short of the triangle edge.
|
|
|
|
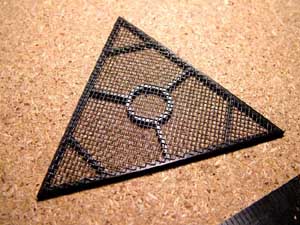
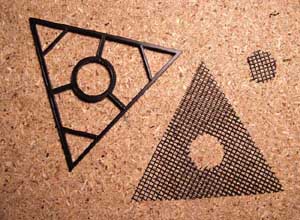
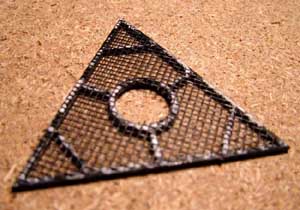
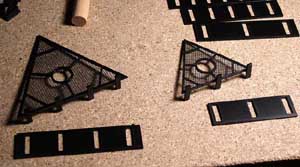
Step 5
You should now have a triangle mesh that fits nicely on top of the triangle frame, with no mesh extending past the edges.
|
|
|
|
Step 6
You can trim a little more off with another cut if needed.
|
|
|
|
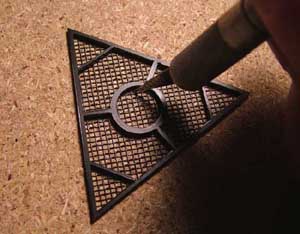
Step 7
Next, use the X-Acto knife to cut a hole in the mesh to accommodate the hole in the triangle frame. This is
where the 1/2" dowel for the tower will be inserted.
|
|
|
|
Step 8
It's not crucial that this be an exact cut; in fact it will end up working better in this step if the mesh
actually extends a little into the opening.
|
|
|
|
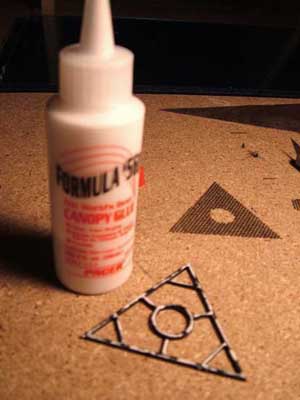
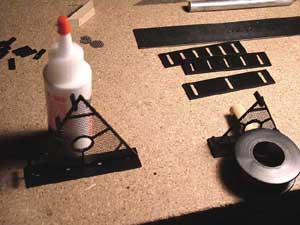
Step 9
Next, apply glue to all the surface area of the triangle frame.
|
|
|
|
Step 10
I have had excellent results using "Formula 560", sometimes called "Canopy Glue". It's water-based, so it's easy
to clean up with a wet napkin. Also, it dries clear, which can help cover up mistakes. Canopy Glue takes a
full 24 hours to cure, but it can be handled carefully after two hours.
While waiting for the glue to dry, repeat the same process to get the screen mesh onto the other triangle frame.
|
|
|
|
Step 11
Be sure that the mesh is flat over the whole surface of the triangle frame. Tap it with your finger or a stick.
|
|
|
|
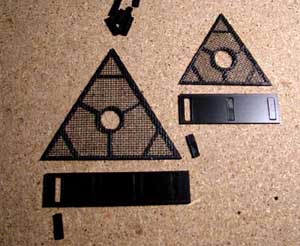
Step 12
After both triangles have completely cured (24 hours), it's time to start assembling the cell amplifiers to the
edges. There is only one template for the smaller triangle, as this size in reality only carries three. For
the larger triangles, you have a choice of 3, 4, 5, or 6 amplifiers.
There are enough amplifier pieces (27) provided
in the kit to affix six to all three sides of the larger triangle, and of course three amplifiers to each side of the smaller triangle.
|
|
|
|
Step 13
Place all amplifiers "face-down" into the template. Look closely at each amplifier piece: one side is generally
nicer-looking than the other, and you want this nicer side to face outward, so place that face down into the template.
Place a small drop of glue right in the center of the back of each amplifier. Take care to avoid getting glue on the
templates, as this will cause it to adhere to the model, which we don't want.
|
|

|
|
Step 14
Place one edge of the triangle on top of the amplifiers in the template. Be sure that the triangle is centered
across all the amplifiers, and also that it is standing straight up (perpendicular with the table surface).
Be sure that the triangle edge is touching where the glue drops are. You may need to prop up the triangle to keep
it straight up while curing. Let it stand to a full cure (24 hours for most adhesives).
|
|
|
|
Step 15
There's no reason not to do both triangles at the same time, and with a 24-hour cure in between each edge, you'll
probably want to do this to speed things up.
|
|
|
|
Step 16
The amplifiers need to be reasonably perpendicular to the triangle frame edges, but it does not have to be perfect.
It will be difficult to see how perfect they are when looking at the model from even a close distance. So get it as
good as you can, but don't worry if it's not perfect.
|
|
|
|
Step 17
After the pieces have fully cured, you can lift the triangles up and out of the templates. Often, despite great care
in keeping the glue off of the templates, they will stick anyway. No worries - just carefully pluck them out using
gentle finger pressure, or using a stick or paint brush handle, etc.
|
|
|
|
Step 18
If you're lucky, the triangle will simply lift right out.
|
|
|
|
Step 19
Now just repeat the same process two more times for the other triangle edges. Note that you do not have to choose
the same number of amplifiers for each side for the larger triangle. In reality, especially in the early days of cellular
technology, there was a variety of numbers of amplifiers facing each direction, based on the need for signal strength,
etc. Improvements in cell amplifier design and technology have progressed so that now, I see more triangles that only
have three to a side.
|
|
|
|
Step 20
If any of the pieces get knocked off, it's pretty easy to glue it back on. Just put the unit back into the
template, and glue that one piece back on.
|
|
|
|
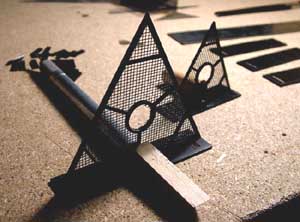
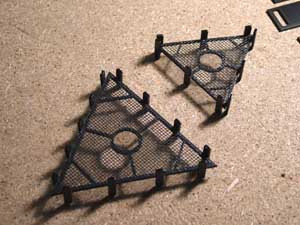
Step 21
Here's roughly what they should look like after all the sides have been done. Time to paint!
|
|
|
|
Step 22
Paint any color you wish. Best results are usually achieved with a quality spray enamel. I used Rust-Oleum Gray Primer
on this particular model. The first one I did for my own layout, I used Testor's Light (Battleship) Gray. You can even use
a different color on the various parts, but you may want to paint them first and then assemble when they are dry if you do it that way.
|
|
|
|
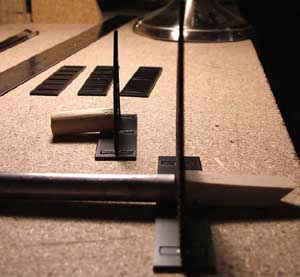
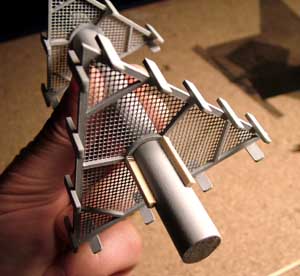
Step 23
Now it's time to get the unit onto a tower head. I keep my cell towers separated into the tower itself, and the tower head
which has the actual triangle units on it. I cut a length of 1/2" wooden dowel about 6" to 8" long. This piece will serve
as the tower head. Depending on how much of the screen mesh extends into the hole openings, you might be able to just
wedge the triangles onto the dowel and position where you like them. If it fits too loose (some dowels are a little skinnier
than others, too), then you can try this. I cut three little pieces of scrap wooden stick (these look to be 1/8" square sticks).
I mount these in a triangular pattern around the dowel, at the height I want the triangle to rest. See the photos.
|
|
|
|
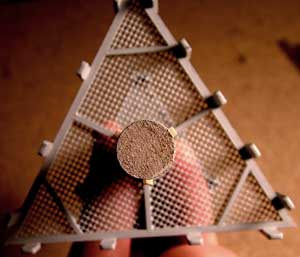
Step 24
You can use the support arms on the triangle as a guide for this. While the glue is setting, you can manipulate them so that your triangle
is sitting level and at the right height. Spray paint the gray over it again when dry.
|
|
|
|
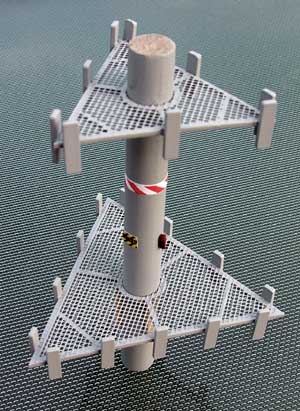
Step 25
I usually apply some graphical stickers for warning signs, etc. I also cut a small piece of wood, painted it red, and glued
it to the side to serve as an emergency phone or control box. Not that it's prototypical (who would know?), but
it adds plausible detail.
|
|
|
|
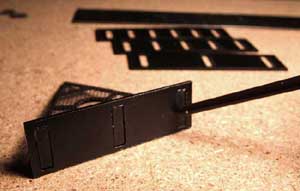
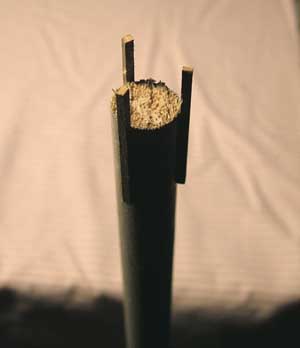
Step 26
Here's how I make it so that the tower head is separable from the rest of the tower. Use the same trick with three
strips of 1/8" square dowel, mounted in a triangular pattern around the top of the tower, extending about a half to maybe
3/4 of an inch. As you can see, the tower head will slide right into place and stay there until you need to take it off.
|
|